Calculating hashes in iOS

Posted in Software on July 27th, 2013 by michael

simulat screenshot

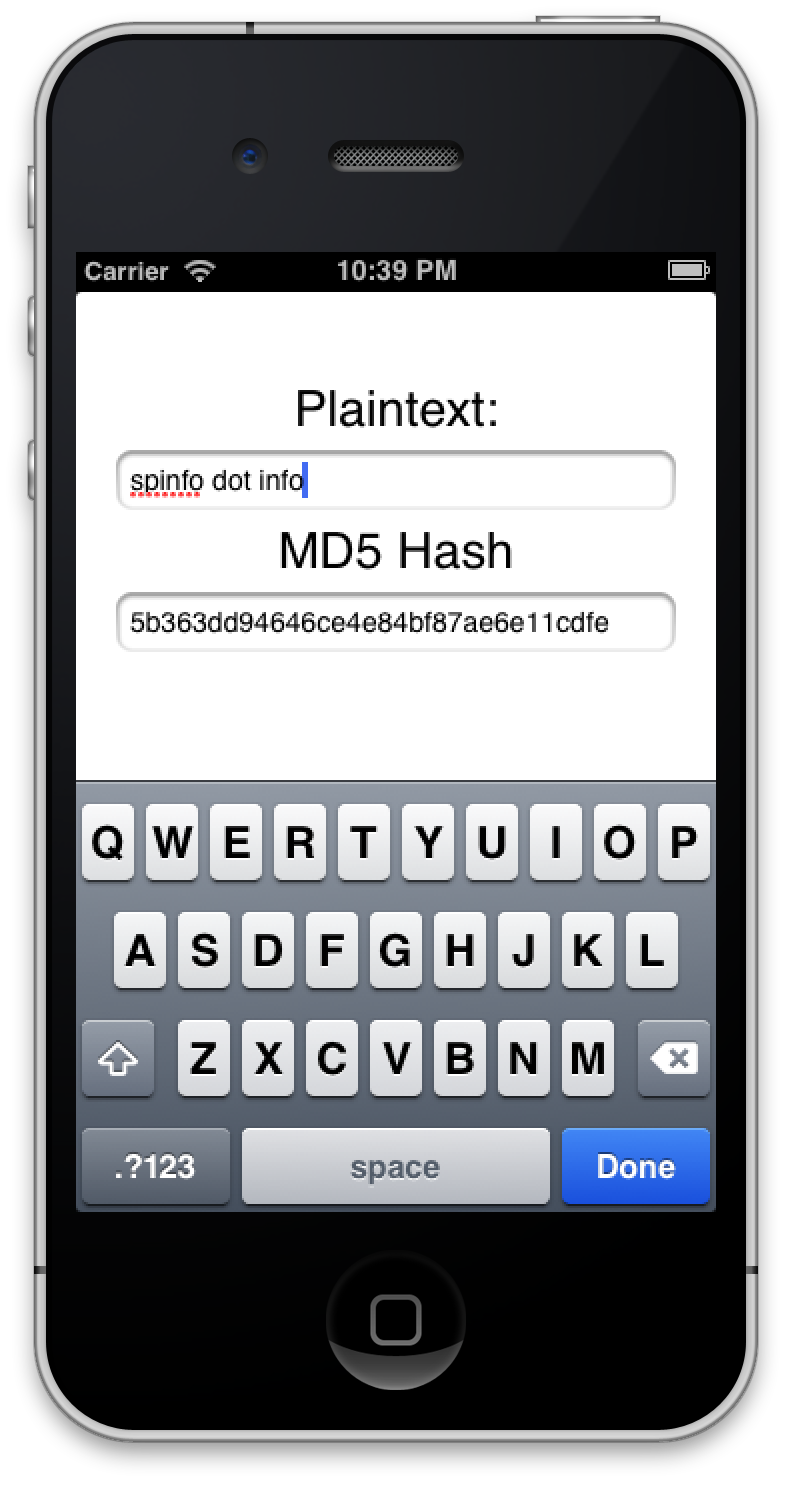
I intended to follow up my last post (Implementing preferences in iOS – the wrong way) with a treatise on how to implement preferences the right way.  Even promised to do it.  But first a brief detour.

I wanted to write a quick demo app to show how to use NSUserDefaults to implement simple preferences.  For that demo, how about something that calculates the MD5 hash of an NSString?  We’ll call it Hasher.  Should be quick and easy, and I need the tech for the project I’m currently working on.  Did a little bit of searching and discovered that Apple provides a C library called Common Crypto.

But I’d rather code in pure Objective C.  A little more searching led me to Matt Gallagher’s excellent Cocoa with Love website and his HashValue wrapper class for Common Crypto.  Just the thing!  After a bit of confusion in using that class, which was written in 2009, I searched just a bit more and found Calvin Cestari’s slight updates that were last published in March 2013.  Download his code here.

Matt’s website does a fairly good job describing his code, but there’s nothing about using it.  So let’s put it together and make it run, shall we?

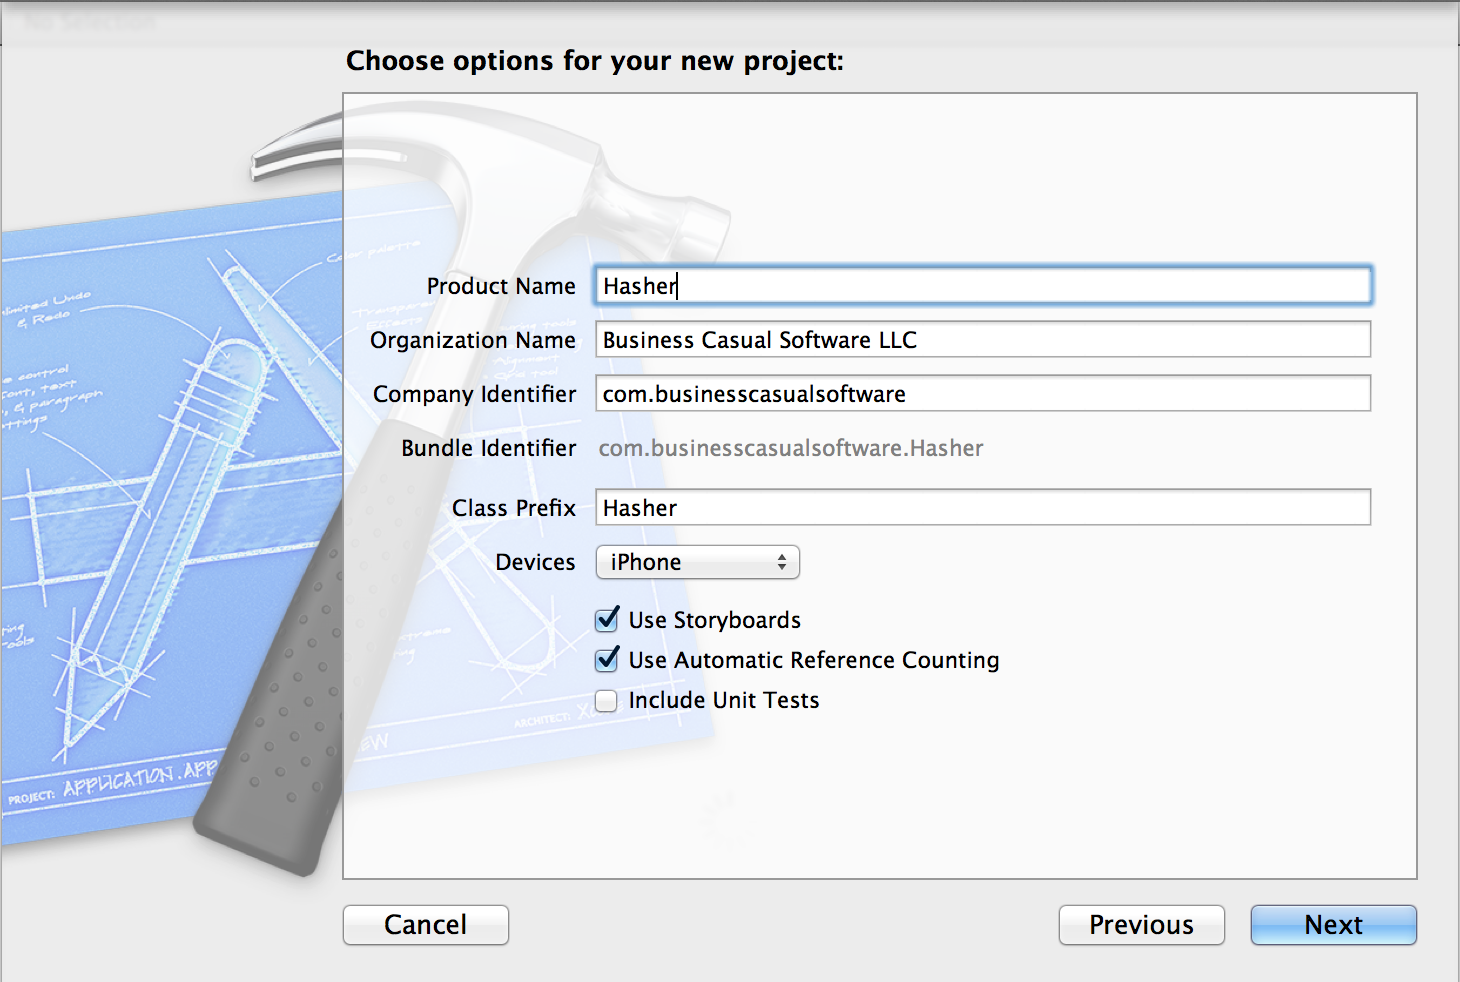
I started out by creating a new iPhone-only single-view application called Hasher.  For this demo, there’s no need to make an iPad version.

Create project

The storyboard is simple: two labels and two text fields.

Storyboard

In HasherViewController.h, I hooked the TextFields up:

@interface HasherViewController : UIViewController
@property (weak, nonatomic) IBOutlet UITextField *plaintext;
@property (weak, nonatomic) IBOutlet UITextField *md5Hash;
@end

And also hooked the plaintext field up to HasherViewController.m:

- (IBAction)calculateHash:(UITextField *)sender
{
}

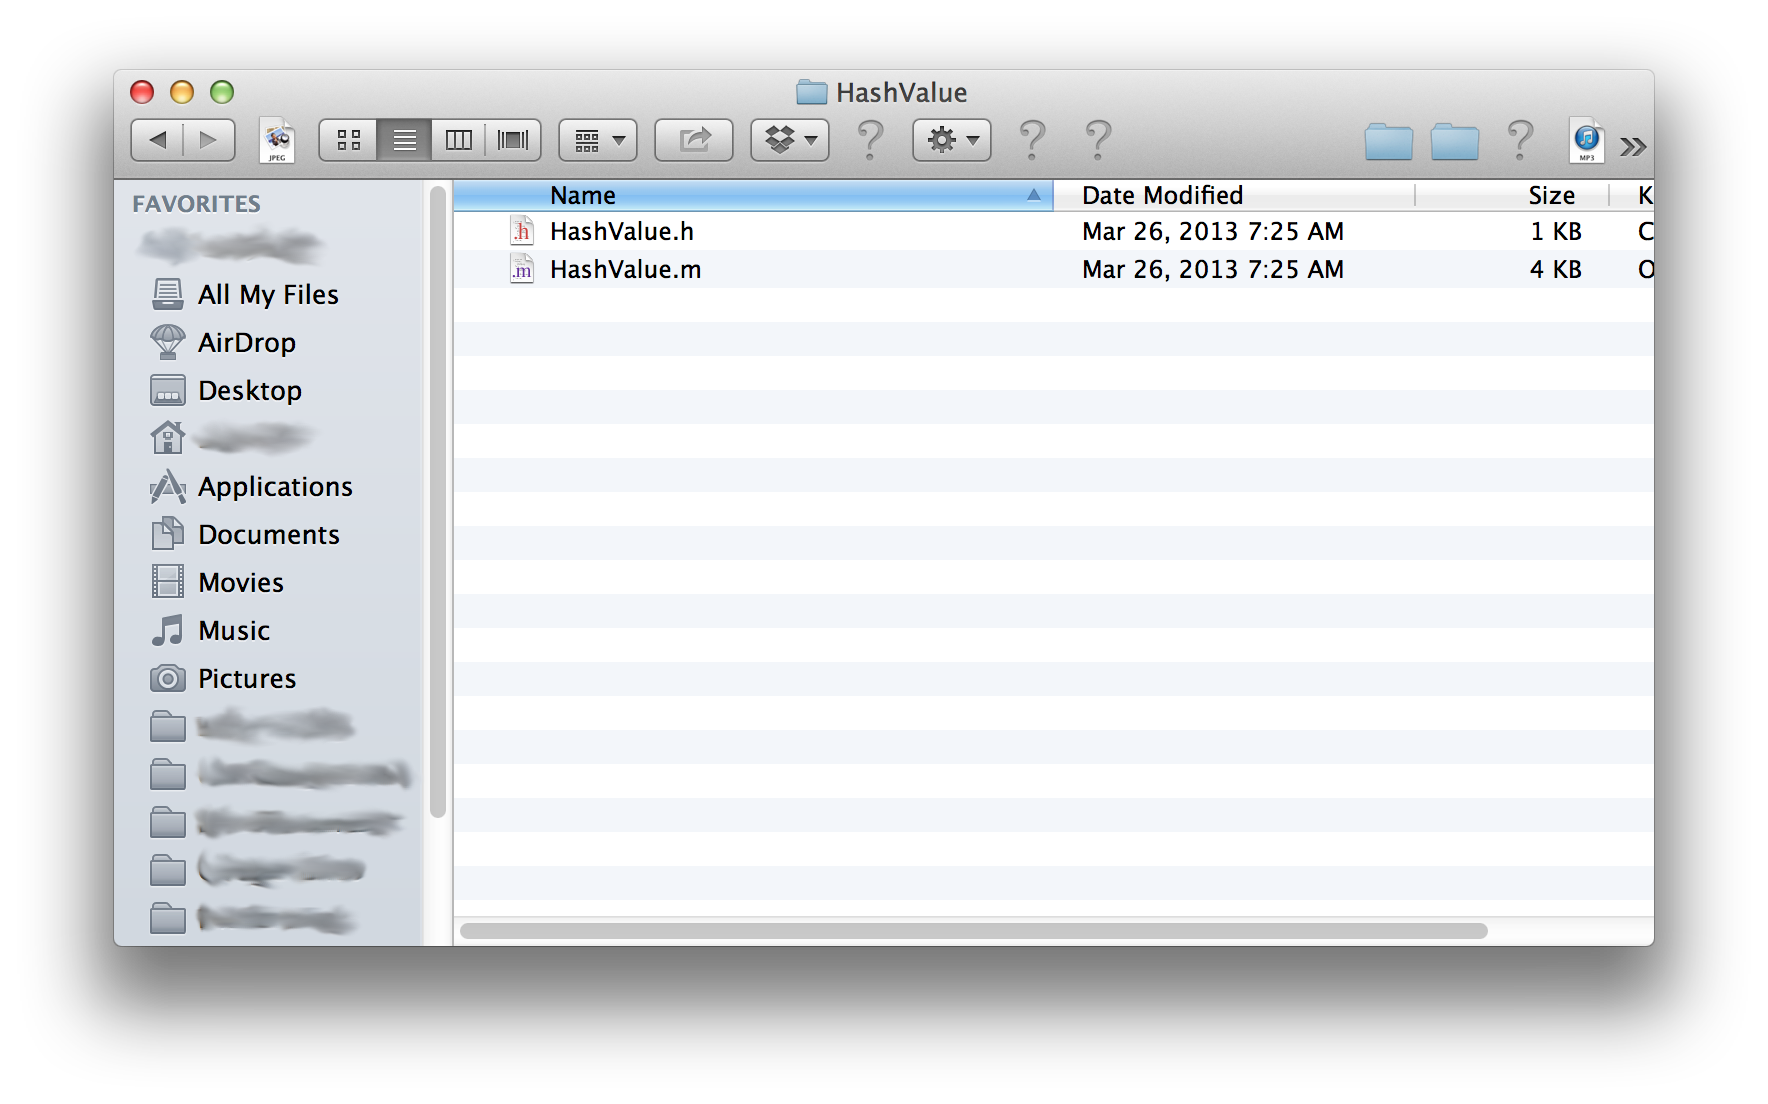
Next, I unzipped the CCToolkit-master.zip file…

HashValue

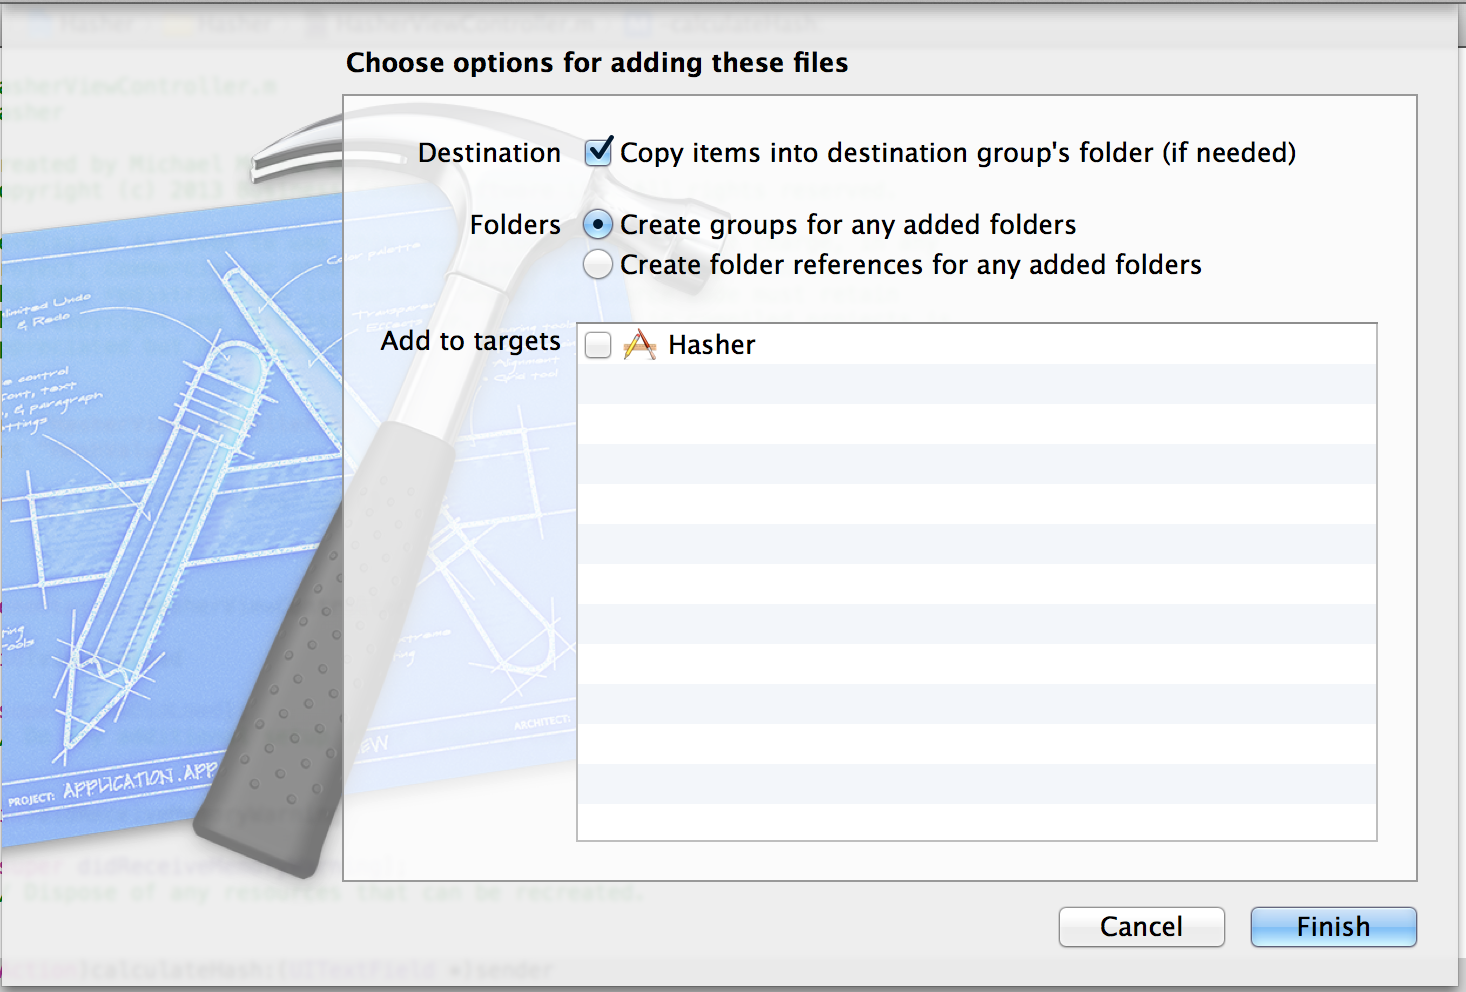
…and dragged the two files into my project.  The first time, I forgot to check the “Add to Targets” box.  Don’t follow my bad example there.

DragFilesIn

The API is pretty simple:

+ (HashValue*)MD5HashWithData:(NSData*)data;
+ (HashValue*)SHA256HashWithData:(NSData*)data;

- (id)initWithBuffer:(const void*)buffer hashValueType:(enum HashValueType)aType;
- (id)initMD5HashWithBytes:(const void*)bytes length:(NSUInteger)length;
- (id)initSHA256HashWithBytes:(const void*)bytes length:(NSUInteger)length;

In fact, we only need the two class methods:

MD5HashWithData:data

and

SHA256HashWithData:data

For this example, we’ll only use the MD5 version.  If you’re planning on hashing passwords for real, though, please note that MD5 is considered to be broken.  Use SHA256.  I didn’t use it here because the 64-character hashes are too long to fit in my Text Field.

So we need just three lines of code.  First, we need to convert our NSString* to NSData*:

NSData* data = [self.plaintext.text dataUsingEncoding:NSUTF8StringEncoding];

Next, we simply make the call:

HashValue *hashValueMD5 = [HashValue MD5HashWithData:data];

And finally, we populate the Text Field:

self.md5Hash.text = hashValueMD5.description;

Before these lines, though, a tiny bit of housekeeping:

if ([self.plaintext.text isEqualToString:@""])
{
self.md5Hash.text = @"";
return;
}

I discovered that, after generating a hash and deleting the plaintext, a hash is still created.  So the housekeeping lines above are just for appearance’s sake.

So here’s the entire HasherViewController.m file:

//
//  HasherViewController.m
//  Hasher
//
//  Created by Michael Morrow on 7/27/13.
//  Copyright (c) 2013 Business Casual Software LLC. All rights reserved.
//
//  Permission is given to use this source code file, free of charge, in any
//  project, commercial or otherwise, entirely at your risk, with the condition
//  that any redistribution (in part or whole) of source code must retain
//  this copyright and permission notice. Attribution in compiled projects is
//  appreciated but not required.
//

#import "HasherViewController.h"
#import "HashValue.h"

@interface HasherViewController ()

@end

@implementation HasherViewController

- (IBAction)calculateHash:(UITextField *)sender
{
  // Blank out the results when the string goes away
  if ([self.plaintext.text isEqualToString:@""])
  {
    self.md5Hash.text = @"";
    return;
  }

  // Get and display an MD5 HashValue object
  NSData* data = [self.plaintext.text dataUsingEncoding:NSUTF8StringEncoding];
  HashValue *hashValueMD5 = [HashValue MD5HashWithData:data];
  self.md5Hash.text = hashValueMD5.description;
}

@end

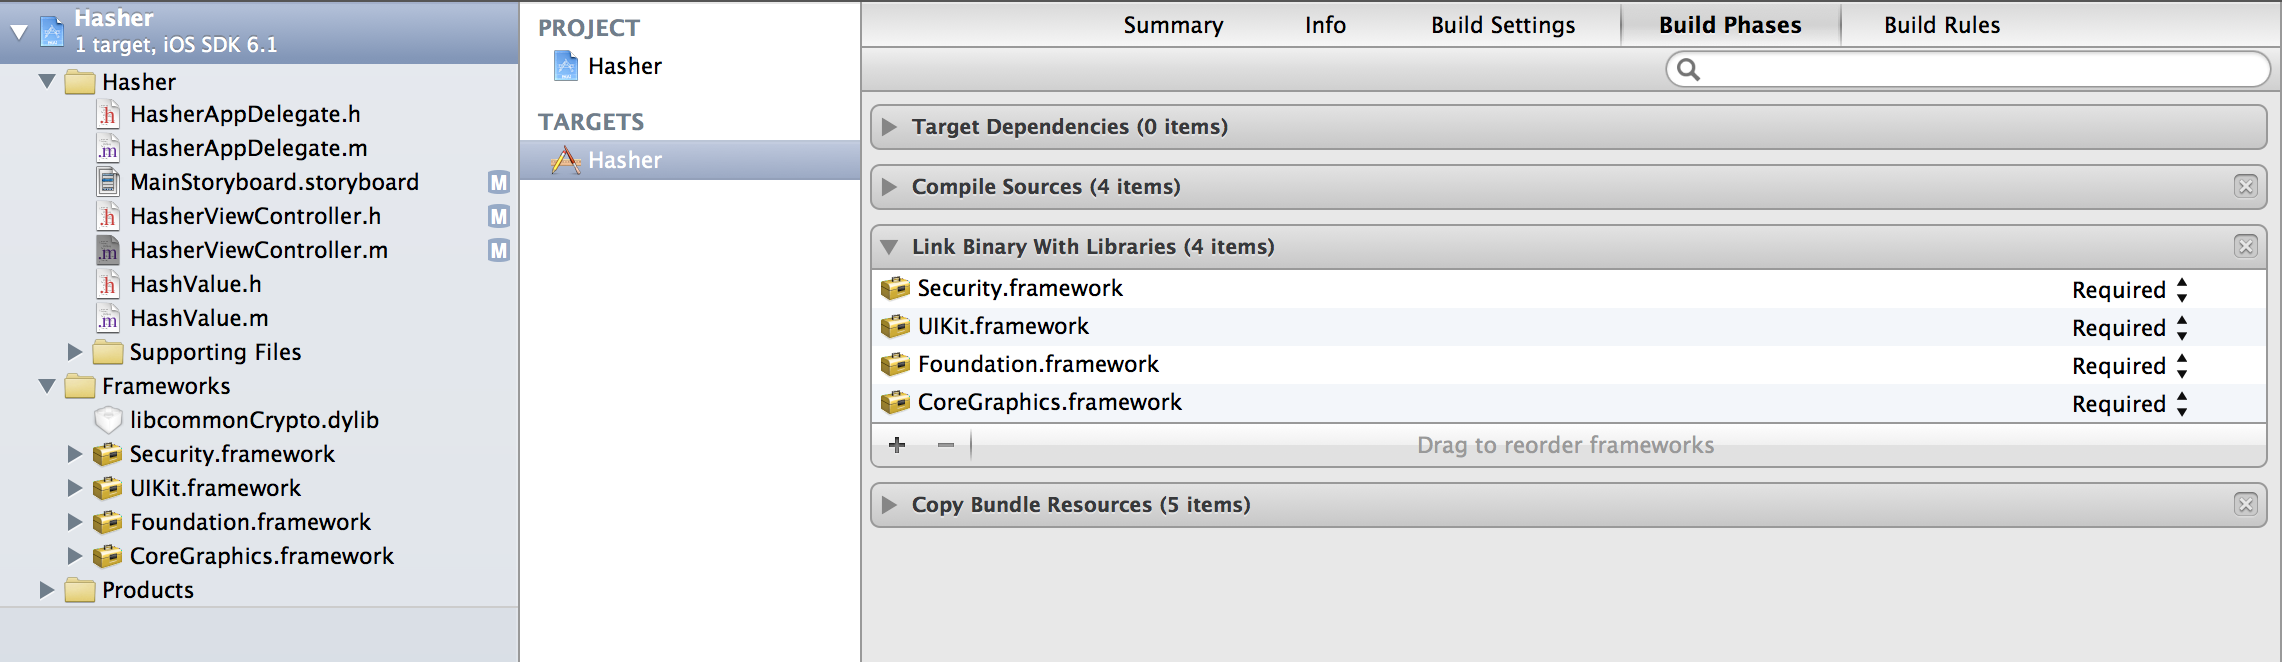
It’s that easy!  Oh, one more thing.  We need to be sure to import the Security framework and the libCommonCrypto library:

Screen Shot 2013-07-27 at 10.45.41 PM

At least I think I needed to import libCommonCrypto.  Maybe I’ll check that out later.

Next time, I’ll expand this project to include preferences.

Download the entire xcode project for this demo here.

Implementing preferences in iOS – the wrong way

Posted in Computer Science, Morse Trainer on July 13th, 2013 by michael

1280px-PAVE_Paws_Computer_Room

It’s not really my fault.  Okay, it is my fault, but I have an excuse.  I was a beginning iOS programmer.  How was I supposed to know?

I’ve been developing software for money since 1985.  In college, we used an IBM 360 mainframe, segued gradually to “mini” computers – a variety of DEC VAXes – and finally got a bit of exposure to the original IBM PC, running MS-DOS.  We learned FORTRAN, Ada, Pascal, PL/1, Prolog, C, and assembly language and had a tiny bit of exposure to Unix.

When I got to industry, it was back to the mainframe.  I developed flight software for the Atlas launch vehicle and its Centaur upper stage.  It was programmed in assembly language and hosted on a CDC Cyber mainframe running a cross-assembler written by us (in FORTRAN!).  The Cyber also hosted our written-in-house linker/loader/simulator.  It was a pretty slick setup for the time, in spite of non-interactivity of the tools.  We spent a lot of time waiting for printouts.  But there were no punchcards!  Unlike the college mainframe.

As the years went by, we graduated to VAXes and high-level languages (Ada!) and then eventually to Sun workstations and other high-level languages (C++!).  And the flight computers became smaller, lighter, and faster as time went on.  Although space-qualified computers are never going to be particularly small, light, or fast.  My iPhone has way more power than the best flight computer I’ve ever worked on.

But there’s a common element among all those machines and my work on them.  There was no such thing as a GUI.  In all my professional rocket science work, I never wrote a single line of software for a person to use.  Quite a handicap as I transitioned to iOS programming.

So it wasn’t entirely my fault when I wrote my first iOS preferences view.  How do you move from your app’s main view to a preferences view, change defaults, and have them apply to the main view when you get back, and do all this while following the sacred object-oriented religion, not sharing any global data between objects, and making preferences persist between executions of the app?  I finally figured it out –  but I had no idea a couple years ago when I wrote my first app.  But I worked something out.

So how do you do it the wrong way?  The file system.  Every time the Morse Trainer app is launched, it checks for the existence of its preferences file.  If it doesn’t exist, it creates it and puts in default values for its two preferences.  It goes through the same routine when transferring from another view (in this case, the only other view is the preferences setter), ensuring that it always knows the user’s current preferences.  Behold:

- (void)viewWillAppear:(BOOL)animated {
 [super viewWillAppear:animated];
 .
 .
 .
 // Get the current stored preferences
 // Get the full path of our preferences data archive file
 NSString *prefsDataPath = [self preferencesDataPath];
 // Attempt to unarchive it
 PreferencesData *preferencesData = [NSKeyedUnarchiver
   unarchiveObjectWithFile:prefsDataPath];
 // If it didn't exist, set it to defaults
 if (!preferencesData)
 {
    // Set to the default data
    sendSpeed = 2; // fast
    textSource = 0; // quotes
  }
  else
  {
    sendSpeed = [preferencesData sendSpeed];
    textSource = [preferencesData textSource];
  }
  .
  .
  .
}

Pretty much the same thing happens in the settings controller, except that all changes are written to disk immediately, just in case the view is swapped out:

-(IBAction) sourceControlIndexChanged
{
  textSource = self.sourceControl.selectedSegmentIndex;

  // Save the current preferences data to disk
  PreferencesData *preferencesData = [[PreferencesData alloc] init];
  [preferencesData setTextSource:textSource];
  [preferencesData setSendSpeed:sendSpeed];

  // Get the full path of our preferences data archive file
  NSString *prefsDataPath = [self preferencesDataPath];
  // Archive the preferences data to file
  [NSKeyedArchiver archiveRootObject:preferencesData
    toFile:prefsDataPath];
  [preferencesData release];
}

And how did I implement the Settings view?  A tab view controller.  Sheesh.  I don’t think I could have done it any more awkwardly.  All I needed to do was push the Settings view controller via a button or something and pop it back off when I was done with it.  But that never occurred to me.  And the Apple reviewers let me get away with it, so I guess it wasn’t too terribly abnormal.

I didn’t know about passing information back and forth between controllers (prepareForSegue in the forward direction and delegation for going back).  So I guess I did the best I could at the time.

I’m about to start a rewrite of the app to add a whole bunch of new content – see this post for a partial shopping list – and I’ll redo both the data storage/retrieval setup as well as how the inter-view navigation takes place.  Watch this space for details on how I’ll do it The Right Way.